


SHO Digital Instrument Cluster Install
The install is broken down into 4 sections, Cluster install, Chime module install, Extra wiring, and Dash trim.
Wiring diagrams and Checklists
Cluster Install
| At the transaxle, unhook the speedometer cable from the VSS and unhook the lower section from the upper section. | |
| Remove instrument panel bezel. There are 2 screws above the cluster, 2 screws under the knee pad, and 1 nut under the headlight knob. After all fasteners are removed a firm tug may be needed to remove bezel. Unhook all switches and lights. Set bezel aside. Note: You may want to remove the steering wheel to have extra room. Its not required but it could be helpful. 4 screws hold the airbag in place from behind and 1 nut attaches the wheel to the column. | |
| Remove the EATC head (if equipped). It's held in with 4 screws and the vacuum lines have 2 10mm nuts holding them in place. Now would be a great time to replace that ratty old EATC unit with a hard button one | |
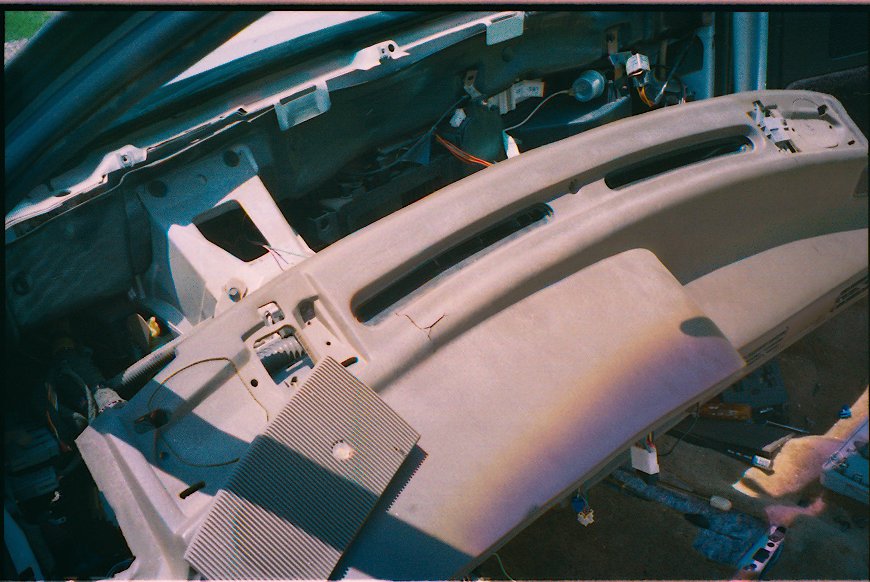
| Remove the 4 screws that hold the instrument cluster in place. Lift the cluster up as far as possible, pulling the bottom toward you, reach behind and unhook the electrical connections (this will be difficult, you may want to try from under the dash if you can get the cluster to move). After the electrical connections are unhooked, pull firmly the cluster toward you, the speedo cable should come out with the cluster. Set old cluster aside. Note: be carful not to damage the steering wheel if you did not remove it. | |
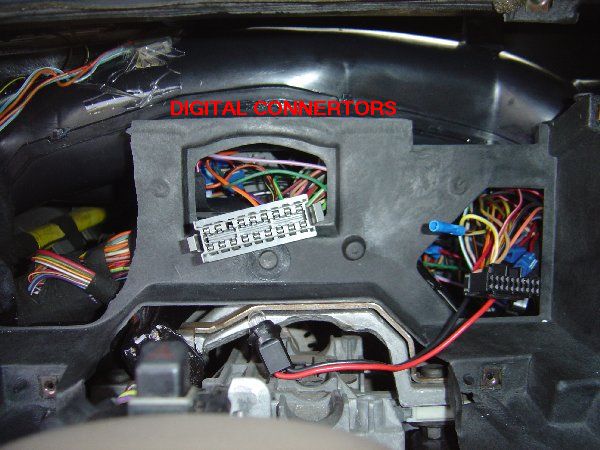
| Identify the 2 existing connectors. You may need to remove some of the wire wrapping to get to the wires. Starting with the larger connector for the digital cluster, start attaching the new connectors. using the pin out check off sheet below, with what ever method you prefer (I left the old connectors and used taps incase I ever wanted to put the old cluster back in). Double check each connection before making a permanent connection. There are around 60 wires to connect, so take you time. Make sure that the larger connector for the digital cluster ends up coming out of the middle hole and the smaller one ends up coming out of the right hole. You will have a hard time getting the cluster bolted down if you don't do this. | |
|
|
| Remove the Low Coolant light housing from the old cluster. Pop out the black piece that has the Low Coolant display in it. Using double stick tape or glue, attach it to the digital cluster. Connect the 2 connectors and turn the car to RUN. Make sure everything lights up correctly and the function buttons work. Start the car and check the Tach, turn signals, fuel gauge, warning lights ect. Make sure the dimmer work when the lights are on. A bunch of stuff won't work yet, and but most of the things will. And DON'T drive the car without the speedo hooked up, good way to get a ticket. | |
|
|
|
|
| You should have several wires left over, they will be attached later (or not at all). Next is the chime module. | |